
Have you ever seen videos on YouTube that look like professional movie scenes? That visual style that catches so much attention is known as cinematic videos, and it doesn’t depend solely on the equipment you use. You don’t need the most expensive drone or the most professional camera. What really matters is knowing how to tell a story and applying certain techniques that transform a normal video into something with a cinematic look.
In this article, I’ll share the 5 keys to making cinematic videos that I apply to all my projects as a filmmaker, including tips for drone cinematic videos, color grading with LUTs, music and sound effects in Artlist, and more. These 5 keys have become an essential part of my workflow as a filmmaker.
So if you’re looking to make cinematic videos that convey emotion, tell a story, and have that professional look you see on YouTube or in movies, you’re in the right place.
Below, I’ll also share a video where you can see these same keys explained visually.
1. Story: What Do You Want to Tell?
If you’re wondering how to make cinematic videos, every cinematic video starts with a story. You don’t need a Hollywood script, but you do need a clear intention. What do you want to tell? What do you want to convey? These are questions you need to ask yourself, and they are necessary to make a good cinematic video. Good storytelling is the foundation of any video. You can shoot an incredible landscape, but if there’s no message or thread connecting the images, the result will feel empty. Whether you work with a camera, a smartphone, or a drone, the important thing isn’t just capturing landscapes, but making your images convey emotion and tell a story.
As a tip, I usually write a small paragraph of a few lines about what I want to convey and the main idea. That serves as my “lighthouse” or “compass” throughout the entire process.
2. Planning and Scripting for Cinematic Videos
Once you know what you want to tell and convey, it’s time to plan and create a more detailed script. Planning is key for a filmmaker and is one of the most important stages in creating cinematic videos because this is where you define structure, rhythm, and the purpose of each shot.
At this stage, I usually determine:
- The main objective of the video
- The locations where I’ll shoot
- The type of shots I want to capture
- And I always prepare a plan B in case of unforeseen issues: weather, permits, or changes in light
- Video structure with beginning, middle, and end
For planning, I use a tool called Milanote. Milanote allows you to create multiple boards and columns to organize your entire storyboard and tasks. I always include the entire process, from the script or voice-over to any ideas that come to mind, calendar, locations, and shot list with everything I want to film.
This part—story and planning—is more than 50% of a cinematic video, so it’s worth dedicating time and resources.
In addition to using Milanote to organize my projects, I like to share something that has helped me a lot when shooting: my travel maps and guides. In them, I keep all the places I’ve been, with practical information like drone flying zones, Google Maps, and useful tips on what to consider before visiting places like Iceland or the Dolomites.
3. Shooting and Composition
Now that we have a clear story and a script, it’s time to go out and shoot. If you’ve created a good script and have a general idea of the story, it’s much easier to shoot and know the approach you want to give to your shots. Here you’ll realize the importance of having a good script, solid planning, and well-defined objectives for the video.
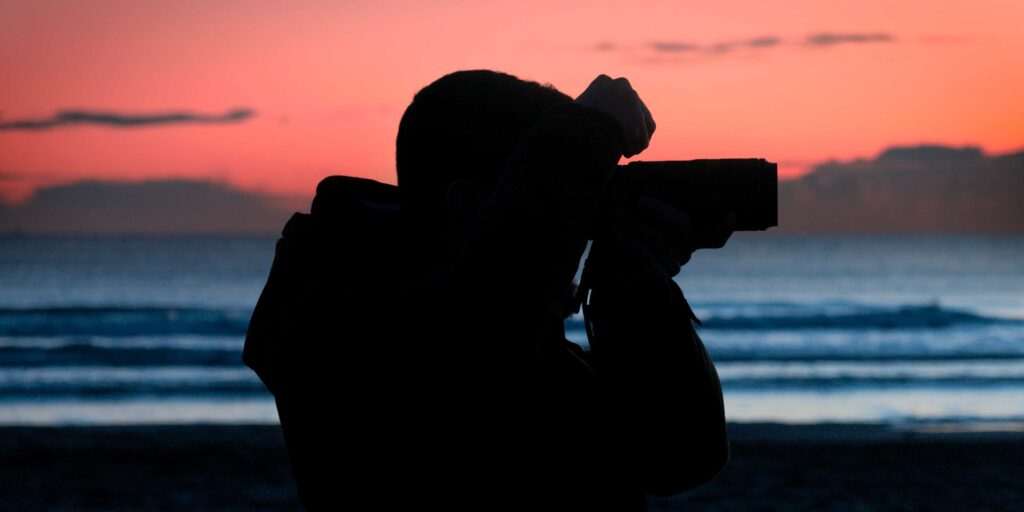
Regarding composition, it’s very important to create a good atmosphere, as this is what really gives the cinematic touch. Lighting plays a fundamental role here. Shooting during the golden hour or blue hour is always a good option because the light is softer and gives each shot a special touch.
Something I really like and that always adds a special plus is including people in the shots. Including people gives the video a closer and more personal touch, making the story go beyond just landscapes.
4. Music and Sound Effects
Usually, in the initial script, I already have an idea of the type of music or mood the video will have. Music is fundamental because it gives the video rhythm and must fit both the message you want to convey and the type of shots in the video.
Personally, I dedicate a lot of time to music—even more than to planning or scripting. One thing that makes my life much easier in this regard is Artlist, a comprehensive library that has all the music and sound effects I need. In the latest versions, they even have amazing AI that can generate a very realistic voice-over.
Another vital point for me is sound effects. Sound effects are key to bringing your videos to life. Beyond music, ambient sounds and specific effects immerse the viewer in the scene, making each shot feel more real and emotional. Basically, we can summarize the effects into three types:
- Ambient sounds: the sound of waves, rain, wind, or even an erupting volcano. These effects create immersion and context for each scene.
- Emotional sounds: small details that highlight feelings, like a character’s sigh, a door slam, or rustling leaves.
- Transition sounds: effects that help make scene or shot changes feel natural and dynamic.

5. Color Grading in Cinematic Videos
Color grading is where a video goes from being a simple recording to a cinematic work of art. Color editing not only corrects exposure or white balance issues but also adds a unique style and conveys emotion through tones. It’s not just about color correction; it’s about conveying feelings through hues, contrast, and lighting.
- Warm tones: convey energy, joy, humanity, and warmth. Think of a golden sunrise or a scene lit with warm natural light.
- Cool tones: evoke solitude, mystery, nostalgia, or distance. For example, a foggy forest or a night scene with blue lights.
In my case, throughout the color grading process, I use my own Cinematic LUTs, which save a lot of time and help achieve a characteristic cinematic look in each video.
These LUTs are compatible with any editing software that supports LUT import, such as Adobe Premiere, DaVinci Resolve, Final Cut, or Photoshop. DJI Mavic 4 Pro, DJI Air 3S, DJI Mini 4 Pro, iPhone 16, Sony A7… No matter the equipment you use, these LUTs are designed to achieve a professional result easily.
Bonus: Enjoy the Creative Process
Creating cinematic videos isn’t just about the final result. The entire process, from story and planning to shooting, sound, and color grading, is an opportunity to learn and grow as a creator. No matter the equipment you use—whether a drone, professional camera, or even a smartphone—the important thing is to convey something and bring every shot to life.
Every mistake, every shot, every edit is a step toward improving your style and technique. Enjoying the process, having fun, and experimenting is what truly makes the difference between a regular video and one that genuinely connects with the audience.